Creating a Basic ToDo App in React: Deep Dive into Components, Events, Props, and useState hook


React as we all know is a popular Javascript library being used by major companies for developing applications. Recently I started learning React and I am about one month into it. But this one month of learning has been good and I understand it quite well. This blog will be very raw, but detailed. I will break down the creation of a simple Todo app so that those who are starting with React like me will be easily able to understand the concepts while creating any app that focuses on the core of React- Components, Events, Props, and useState hook.
Do note this is not the best Todo app visually out there. Rather this is a basic functional Todo app, where you can add and delete Todos and will understand the concepts mentioned. I will attach the GitHub link to the code below for reference. The project is divided into 3 versions where we will understand and create the app then introduce Events and Props and in the end usestate hook. A lot of things coming up, hence take your coffee, and let's get started.
Todo App- Version 1- Creating the Basic UI and Understanding Components
We initialize the project using vite. Create a directory and open it in VS code. In the VS code terminal, use npm create vite@latest to initialize the react project and use Javascript as a language.
Once the basic folder structure is in place, we can start writing our code. You can opt for installing Bootstrap into the project and get the npm installation commands from Download · Bootstrap v5.3 (getbootstrap.com)
If you want to refer to my code download using the git clone and save it locally. The links to each version will be given at the end.
npm install bootstrap@5.3.3
Now, we have the App.jsx file where we need to write the code. But is it a good idea to write everything inside App.jsx? Absolutely no. As of now, it's a simple Todo app that will have further functionalities later, bombarding everything in App.jsx would not be a good idea. Breaking down each section or functionality will help make the code easier to understand and maintain. Any change in one component will not affect the other (unless they are related directly to each other) and we can fix a bug easily if it's divided into components.
Now, we will start with creating the UI which will finally look like this

Here in this version, the Todo items and date are hardcoded and the Add and Delete buttons do not have any functionality.
To achieve this, we create a components folder inside src. We created an AddTodo.jsx file where we will have the input fields and Add button which will give a list/tabular structure to the Todo list.
We create two TodoItem components as the TodoItems in this version of the React app are hardcoded. In the code, you will find the TodoItem1.jsx and TodoItem2.jsx where the items are declared inside as variables. As you can see in the code snippet below; {todoName} and {todoDate} fields are being populated with the declared variables. The two items also have the Delete button separately.

This was pretty much it in components.
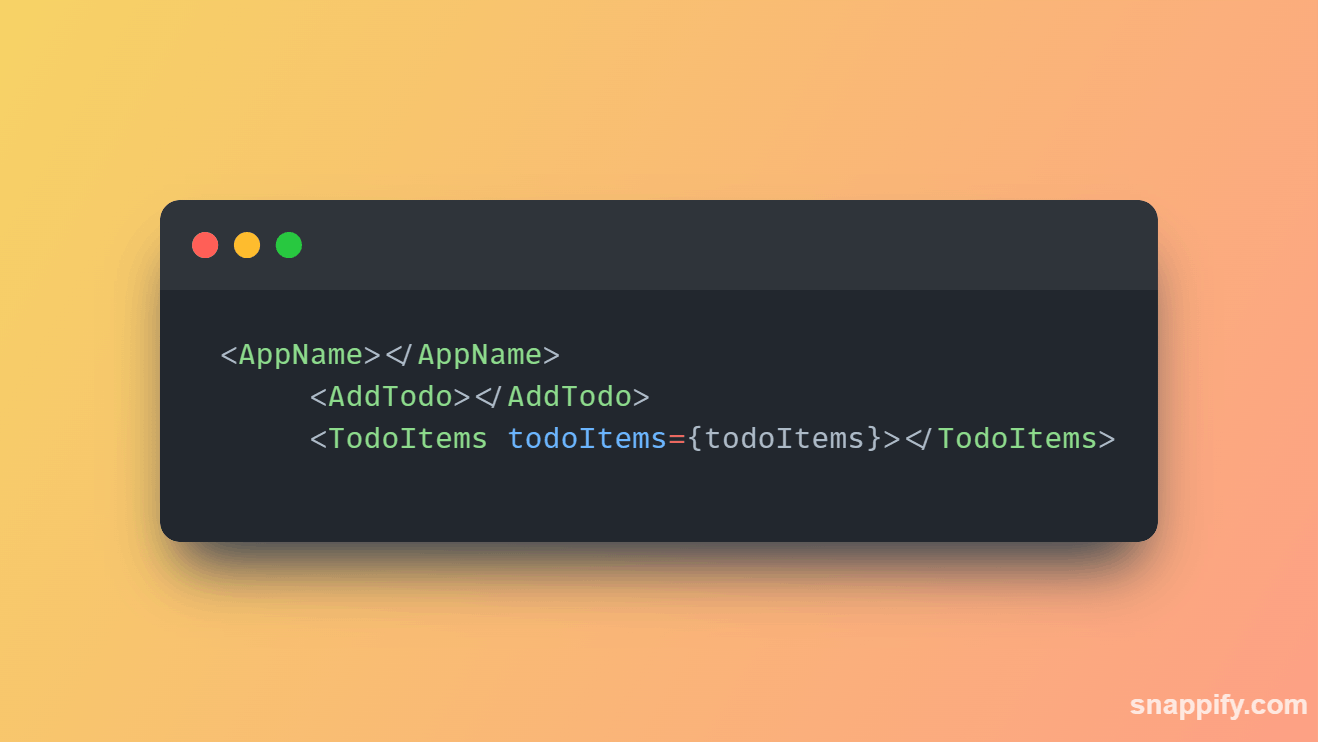
Now in App.jsx file we will import all the components and place the components created one after the other. That is how we achieve the UI as we saw earlier.
Run the command below to start the app and open the link in a browser.
You can check and download the code locally in the GitHub repository here: SOUMYADIPRONY/todo-app-v1: Version 1 of Todo App (github.com)
Conclusion
In version one of the Todo app, we understood how we broke the various sections of the app into components. Wait if you feel it was too basic because, in the next two sections, we will further polish the code and even add functionality. Let's jump into version two of the Todo app.
Todo App- Version 2- Understanding Props
In our last version, we saw how we created the Todo Items. For each item, we had to create a separate component. We don't want this, because our component should take the items from one component and show it to the UI. In this version, we do not yet have the Add functionality but we will change the component structure. Here the items will be passed from App.jsx (hardcoded for now) to the component for displaying.
This involves parent-child communication, where the App.jsx is the parent and the other items in the components are the child. Hence we get introduced to the concept of props. In short,
The UI will look as follows:

Not much difference right? But unlike last time all the listed items are not having a separate component. We have hardcoded the items in the App.jsx and passed the items as a prop. The TodoItems component will receive the items and will pass the items to the TodoItem component to display in the UI.
Now, the TodoItems.jsx looks something like this:

In this component, we first imported the TodoItem component as it gives the tabular structure to the list, and all the items from TodoItems will get populated in the UI.
In the TodoItems component above, we have declared the function TodoItems ({todoItems}). We have used prop destructuring in the TodoItems component as we have directly fetched it as it is in the function instead of using the {props.todoItems}.
With this, we catch the prop passed from the App.jsx earlier. It will enable the component to fetch the items. To do so, we use the map method in the function which will iterate over the array we get from the prop and help us render the list. Next, we pass the items to the TodoItem component as props again.
Now your question might be I mentioned that props is passing the data from parent to child. Here parent is App.jsx and the rest are a child. Then how are we passing props from TodoItems to TodoItem? This is known as prop drilling.
In the TodoItem component, we pass the props in the function as function TodoItem({ todoName, todoDate }), and with that, we can easily get the above UI. We can pass hundreds of items and we don't need to create a separate component for each item which is not feasible anyway.
function TodoItem({ todoName, todoDate }) {
  return (
    <div className="container">
      <div className="row sd-row">
        <div className="col-6">{todoName}</div>
        <div className="col-4">{todoDate}</div>
        <div className="col-2">
          <button type="button" className="btn btn-danger delete">
            Delete
          </button>
        </div>
      </div>
    </div>
  );
}

export default TodoItem;
Conclusion
We hope that you understand now how we can pass and render items in UI with props. Props are immutable which means you cannot modify it and is read-only. But it is quite powerful as it enables components to communicate with each other. We have not only seen parent-child communication but also child-child communication with prop drilling.
With that the second version of our Todo app is ready. We have now understood the components and props. Let's get to the last version of the Todo app where we will add functionality to the app and get hands-on with the usestate hook.
Find the code of the todo app version 2 here: SOUMYADIPRONY/todo-app-v2: Todo app version two with props (github.com)
Todo App- Version 3- Understanding Events and useState hook
The ultimate requirement in a Todo app is to add and delete items. But how to do that? On clicking an add or delete button how the app will render the items? How the list will look in the UI? All the questions can be answered using two things- events and useState.
What are Events?
What is the useState hook?
useState hook is a feature in React that allows functional components to manage their state. Syntax of useState is as follows: const [count, setCount] = useState(0) where useState is the hook that passes the returned array to the count and setCount; where count represents the current value of our state variable and setCount is the function with which we update the value of our state variable.Now let's look at how we use the usestate hook and events in our final app version. On implementing this we will be able to add functionality to the app and remove all the hardcoded list items we are having.
In our App.jsx(parent app component) we declare the useState hook,
let [todoItems, setTodoItems] = useState([]);
If we see the structure, data will be passed from the AddTodo component. Hence we need to pass a method to AddTodo so that it passes the item name and date to be added.
 const onButtonClick = (itemName, itemDueDate) => {
 console.log(`New Item Added: ${itemName} Date: ${itemDueDate}`);
}
<AddTodo onButtonClick={onButtonClick}></AddTodo>
We passed the above onButtonClick to AddTodo and now the AddTodo component needs to get the prop, hence we need to do the required updation in AddTodo.jsx.
function AddTodo({ onButtonClick }){.....} //more code to be present inside ....
Now in the AddTodo component, we have two items that take input. For those fields, we declare local states with useState, so the items are passed to the App. The entire code looks like this.
import { useState } from "react";
import { IoIosAddCircleOutline } from "react-icons/io";

function AddTodo({ onButtonClick }) {
  const [todoName, setTodoName] = useState("");

  const [dueDate, setDueDate] = useState("");
  const handleNameChange = (e) => {
    setTodoName(e.target.value);
  };

  const handleDateChange = (e) => {
    setDueDate(e.target.value);
  };

  const handleAddButtonClicked = () => {
    onButtonClick(todoName, dueDate);
    setDueDate("");
    setTodoName("");
  };

  return (
    <>
      <div className="container">
        <div className="row sd-row">
          <div className="col-6">
            <input
              type="text"
              placeholder="Enter ToDo here"
              value={todoName}
              onChange={handleNameChange}
            ></input>
          </div>
          <div className="col-4">
            <input
              type="date"
              value={dueDate}
              onChange={handleDateChange}
            ></input>
          </div>
          <div className="col-2">
            <button
              type="button"
              className="btn btn-success add"
              onClick={handleAddButtonClicked}
            >
              <IoIosAddCircleOutline />
            </button>
          </div>
        </div>
      </div>
    </>
  );
}

export default AddTodo;
As you see in the above code we have declared two states for the name and date item. Additionally, we created two functions- handleNameChange and handleDateChange to get the value. But on clicking the add button we will be able to add items but how to do it so that the items get added? For that, we declare another function handleAddButtonClicked. We invoke the onButtonClick function inside the handleAddButtonClicked which will take the current state of todoName and todoDate -> onButtonClick(todoName, dueDate);
Now after adding the items we need to make the input field empty by updating the state, hence we can set the state as an empty string.
The job of the AddTodo component is done and it will pass data to its parent. But we haven't completed the App.jsx completely as we need to catch and update the data received from the AddTodo component and set the state with the itemName and itemDueDate. Here is the updated part:
 const onButtonClick = (itemName, itemDueDate) => {
    console.log(`New Item Added: ${itemName} Date: ${itemDueDate}`);
    const newTodoItems = [
      ...todoItems,
      { name: itemName, dueDate: itemDueDate },
    ];
 setTodoItems(newTodoItems);
We have got the added functionality now. Summarising the flow of what we did with the useState hook.
In App.jsx we declared a useState hook for todo items and a function to pass it as a prop to the AddTodo component.
In AddTodo.jsx we catch the prop and create two states each for itemName and itemDate. The states get updated with the two functions(handleNameChange and handleDateChange) catching the event from the input field. Next, we create another function( handleAddButtonClicked) to handle the add button event which will pass the item names and date to the state and again reset the state as empty.
We come back to the App.jsx (parent app component) and update the onButtonClick function which takes the items coming from the AddTodo component.
Now, let's create the functionality for the delete button. Following the previous format, we will create a function and pass it to the TodoItems component as prop which will connect the parent (App.jsx) and the child component (TodoItems.jsx). The code for the same,
  const handleDeleteItem = (todoItemName) => {
    const newTodoItems = todoItems.filter((item) => item.name !== todoItemName);
    setTodoItems(newTodoItems);
    console.log(`Item Deleted: ${todoItemName}`);
  };

return (
//remaining components - refer Github repo for complete reference
<TodoItems todoItems={todoItems} onDeleteClick={handleDeleteItem}></TodoItems>

)
In the handleDeleteItem function, we pass the todoItemName based on which the delete event will handle deletion (assuming the name does not repeat here, since we have not used ID in its app, otherwise a good idea is to add ID in the app).
We declare a newTodoItems variable and use the filter method where we fetch each of the items in the list and then narrow it down to get the name of the item where we use the condition item.name is not equal to todoItemName. This means if the name does not match we won't delete and if it matches then delete the item. Since the filter creates a new array, we get the new state(updated list) but set the state with the newTodoItems.
In the TodoItems component, we take the prop in the function. But if you remember from version 2, we had included the TodoItem component inside TodoItems.Hence we pass the prop received from the App component to the child of TodoItems which is TodoItem. The code in the TodoItem looks like this
import TodoItem from "./TodoItem";
function TodoItems({ todoItems, onDeleteClick }) {
  return (
    <>
      <div className="items-container">
        {todoItems.map((item) => (
          <TodoItem
            key={item.name}
            todoName={item.name}
            todoDate={item.dueDate}
            onDeleteClick={onDeleteClick}
          ></TodoItem>
        ))}
      </div>
    </>
  );
}

export default TodoItems;
We now move to the TodoItem component which we catch the prop from TodoItems. In this component, we have passed the function to the delete button. Inside the onClick event, we call the onDeleteClick where we pass the todoName based on which the item will be deleted. The code :
function TodoItem({ todoName, todoDate, onDeleteClick }) {
  return (
    <div className="container">
      <div className="row sd-row">
        <div className="col-6">{todoName}</div>
        <div className="col-4">{todoDate}</div>
        <div className="col-2">
          <button type="button" className="btn btn-danger delete"
            onClick={() => onDeleteClick(todoName)}
          >
            <MdOutlineDeleteOutline />
          </button>
        </div>
      </div>
    </div>
  );
}

export default TodoItem;
Summarising the flow for what we did for handling the delete event:
In the App component, we declare a function to handle the delete event. We pass it as a prop to it's child TodoItems component. In the TodoItems we receive the prop and we pass it to it's child TodoItem component.
In the TodoItem component, we catch the prop and use the onClick event where we call the delete function received and pass the todoName based on which the deletion will occur.
Lastly in the delete event function in the App component, we set the set with the items remaining after deletion after using the filter method.
Github Repo for version 3: SOUMYADIPRONY/todo-app-v3: Todo app version three with useState and events (github.com)
Final Conclusion
In this article, we developed a basic Todo app, where we first understood the components. But at that time the components were not talking to each other i.e. there was no communication between parent and child components.
Second, we understood props where we eliminated the requirement of having separated components for each item which is not feasible, and in the end, we got hands-on with the useState hook and events, where we used props as well. There was a parent-child communication and event handling.
The idea was not just to create a Todo app but as a beginner in React to understand how different components interact with each other. If you understand this I hope life will be easy whenever we talk about props, useState, events, and while developing any app that has similar functionality.
I hope this was a good read, cheers 🥂.